
DHCP Snooping, Dynamic ARP inspection, Port Security
Exercise 4 – Configuring Layer 2 Security Features
Sometimes a network could have traffic that is malicious. These types of traffic cannot be filtered with an access-list. For example, if we have clients that are configured to dynamically get an IP address from a DHCP server, there’s a risk that an attacker can set up a rogue DHCP server and provide an IP address to a client using his IP as a gateway. The client’s network traffic would then directly travel to the attacker.
Layer 2 security features provide another aspect of security on layer 2, where you can protect your users from illegal DHCP servers. This is called DHCP snooping.
You can also configure MAC address filtering per switchport and prevent illegal PCs from getting access to the network.
In this exercise, you will learn how to configure different layer 2 security features.
Learning Outcomes
After completing this exercise, you will be able to:
- Configure DHCP Snooping
- Configure Dynamic ARP Inspection
- Configure Port Security
Task 1 – Configuring DHCP Snooping
When a DHCP client wants to get an IP address from a DHCP server, a broadcast DHCP discover message is sent to the DHCP servers requesting an offer. When a server gets that message, it sends an offer message that contains an actual IP address. The DHCP client accepts the first offer by sending a DHCP request message back to the server.
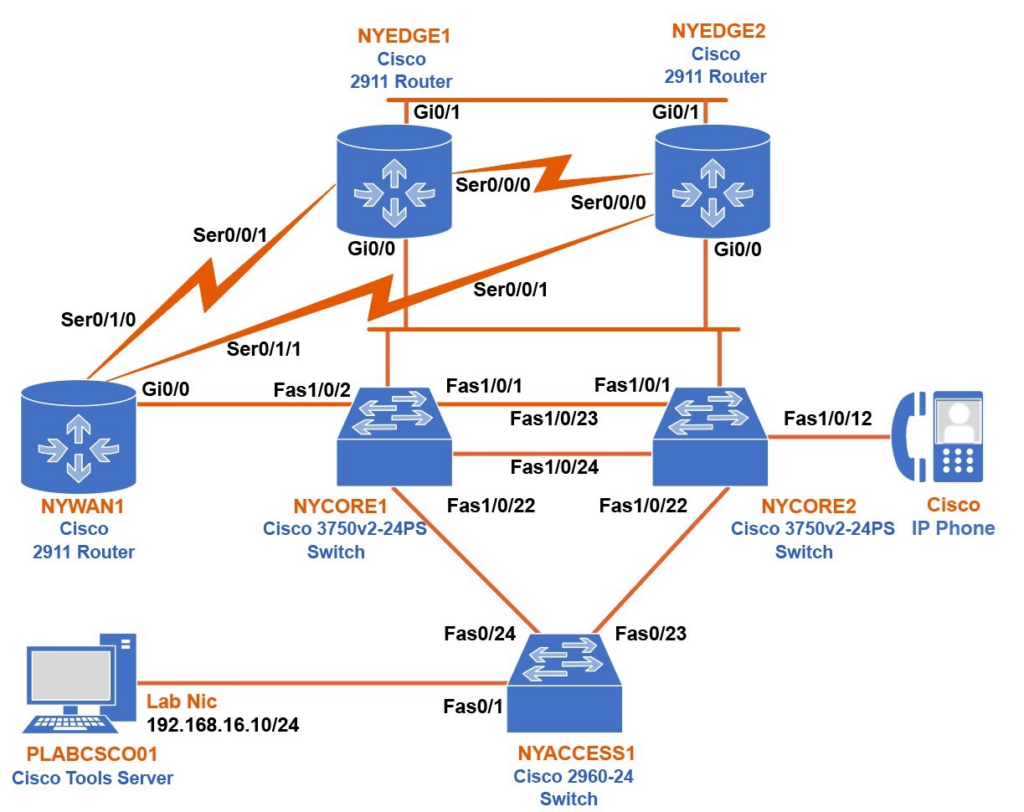
When you enable DHCP snooping on your switch, you are actually telling the switch to track DCHP discover and DHCP offer messages. When you enable DHCP snooping on a switch, all interfaces will be in an untrusted state, which means they will block the DHCP offer messages. If you leave it like this, you will block a legal DHCP server on your network too. You need to trust the interface where your DHCP server is connected and also configure all uplinks to other switches as trusted. In this task, you will configure NYCORE2 as DHCP client and NYWAN1 as a DHCP server and enable DHCP snooping on NYCORE1.
Step 1
Connect to NYCORE1 and enable DHCP snooping globally as well as for all VLANs (in our case, we only have VLAN1).
Type the following commands (press Enter after each command):
NYCORE1#
configure terminal
NYCORE1(config)#
ip dhcp snooping
NYCORE1(config)#
ip dhcp snooping vlan 1
NYCORE1(config)#
no ip dhcp snooping information option
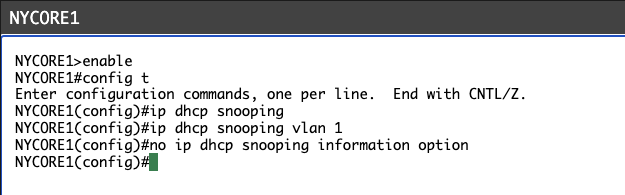
You will see the following output:
NYCORE1#configure terminal
Enter configuration commands, one per line.  End with CNTL/Z.
NYCORE1(config)#ip dhcp snooping
NYCORE1(config)#ip dhcp snooping vlan 1
NYCORE1(config)#no ip dhcp snooping information option
NYCORE1(config)#
Note:
By default, the switch adds option 82 to the DHCP discover message before passing it to the DHCP server. The DHCP server then drops those packets. You need to disable this feature on a switch.
My Output:
Step 2
Connect to NYWAN1 and configure it as a DHCP server. You will make the server assign IP addresses between the range 192.168.16.200 – 192.168.16.254.
Type the following commands (press Enter after each command):
NYWAN1#
configure terminal
NYWAN1(config)#
ip dhcp excluded-address 192.168.16.1 192.168.16.199
NYWAN1(config)#
ip dhcp pool POOL
NYWAN1(dhcp-config)#
network 192.168.16.0 255.255.255.0
NYWAN1(dhcp-config)#
default-router 192.168.16.1
NYWAN1(dhcp-config)#
exit
NYWAN1(config)#
exit
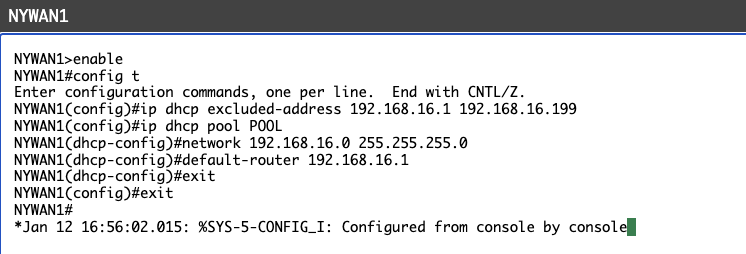
You will see the following output:
NYWAN1#configure terminal
Enter configuration commands, one per line.  End with CNTL/Z.
NYWAN1(config)#ip dhcp excluded-address 192.168.16.1 192.168.16.199
NYWAN1(config)#ip dhcp pool POOL
NYWAN1(dhcp-config)#network 192.168.16.0 255.255.255.0
NYWAN1(dhcp-config)#default-router 192.168.16.1
NYWAN1(dhcp-config)#exit
NYWAN1(config)#exit
NYWAN1#
My Output:
Step 3
Connect to NYCORE2 and make port Fa1/0/23 as a routed port. You will also configure it as a DHCP client.
Type the following commands (press Enter after each command):
NYCORE2#
configure terminal
NYCORE2(config)#
interface fastethernet1/0/23
NYCORE2(config-if)#
no switchport
NYCORE2(config-if)#
ip address dhcp
NYCORE2(config-if)#
no shutdown
NYCORE2(config-if)#
exit
NYCORE2(config)#
exit
You will see the following output:
NYCORE2#configure terminal
Enter configuration commands, one per line.  End with CNTL/Z.
NYCORE2(config)#interface fastethernet1/0/23
NYCORE2(config-if)#no switchport
NYCORE2(config-if)#ip address dhcp
NYCORE2(config-if)#no shutdown
NYCORE2(config-if)#exit
NYCORE2(config)#exit
NYCORE2#
My Output:
Step 4
You will now verify if the port has received the IP address. To do this, type the following command:
NYCORE2#
show interface fastethernet1/0/23
Press Enter.
You will see the following output:
NYCORE2#show interface fastethernet1/0/23
FastEthernet1/0/23 is up, line protocol is up (connected)
  Hardware is Fast Ethernet, address is 10bd.18e1.a141 (bia 10bd.18e1.a141)
  Internet address will be negotiated using DHCP
  MTU 1500 bytes, BW 100000 Kbit, DLY 100 usec,
     reliability 255/255, txload 1/255, rxload 1/255
  Encapsulation ARPA, loopback not set
  Keepalive set (10 sec)
  Full-duplex, 100Mb/s, media type is 10/100BaseTX
  input flow-control is off, output flow-control is unsupported
  ARP type: ARPA, ARP Timeout 04:00:00
  Last input 00:00:00, output 00:00:04, output hang never
  Last clearing of "show interface" counters never
  Input queue: 0/75/0/0 (size/max/drops/flushes); Total output drops: 0
  Queueing strategy: fifo
  Output queue: 0/40 (size/max)
<------Output Omitted ------->
NYCORE2#
My Output:
Notice from the above output, the port doesn’t have an IP address assigned to it yet.
Step 5
You will now make the port where your DHCP server is connected as trusted.
Connect to NYCORE1 and type the following commands (press Enter after each command):
NYCORE1(config)#
interface fastethernet1/0/2
NYCORE1(config-if)#
ip dhcp snooping trust
NYCORE1(config-if)#
exit
NYCORE1(config)#
exit
You will see the following output:
NYCORE1(config)#interface fastethernet1/0/2
NYCORE1(config-if)#ip dhcp snooping trust
NYCORE1(config-if)#exit
NYCORE1(config)#exit
NYCORE1#
My Output:

Step 6
Now verify if the client has received an IP address.
Connect to NYCORE2 and type the following command:
NYCORE2#
show interface fastethernet1/0/23
Press Enter.
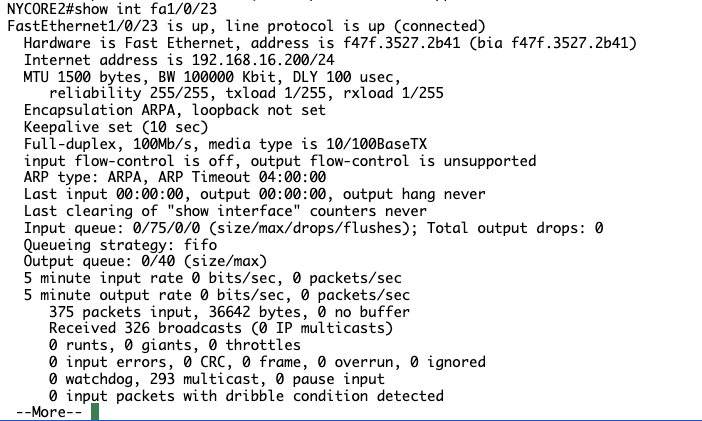
You will see the following output:
NYCORE2#show interface fastethernet1/0/23
FastEthernet1/0/23 is up, line protocol is up (connected)
  Hardware is Fast Ethernet, address is 10bd.18e1.a141 (bia 10bd.18e1.a141)
Internet address is 192.168.16.200/24
  MTU 1500 bytes, BW 100000 Kbit, DLY 100 usec,
     reliability 255/255, txload 1/255, rxload 1/255
<------Output Omitted ------->
NYCORE2#
Notice that after you tell the switch to trust our DHCP address, the client gets an IP address.
APPLIED CONFIGS FROM STEP 3 ONWARDS ON NYCORE1 INSTEAD OF NYCORE2, TIME TO RESOLVE
First I will see if I can apply same configurations to nycore2 without creating any issues
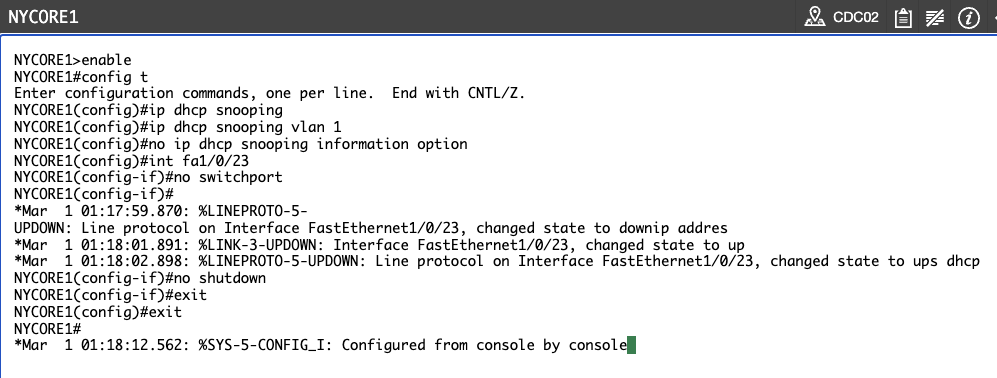
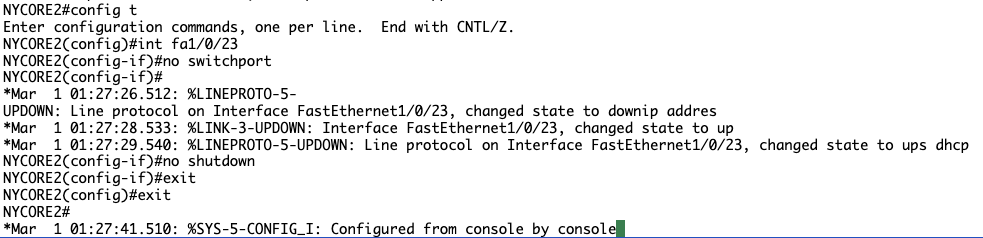
Step 3:
Step 4:
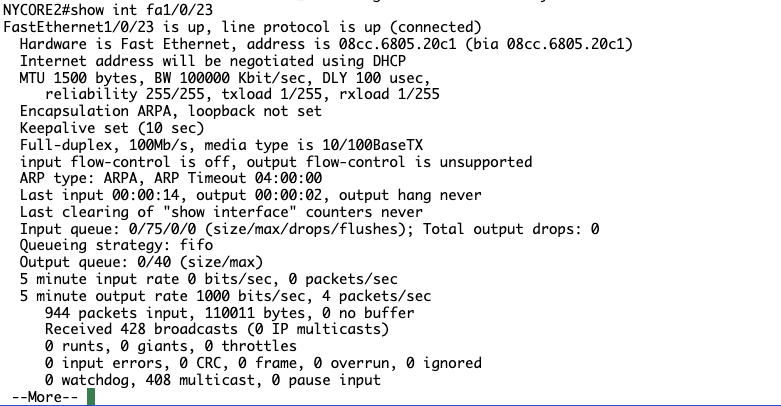
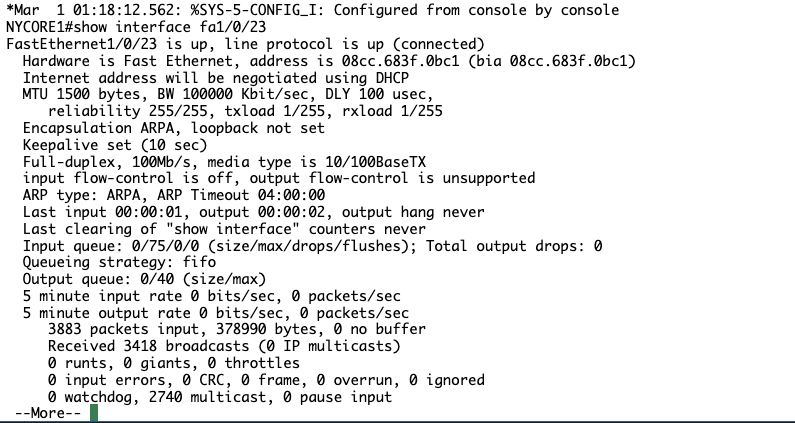
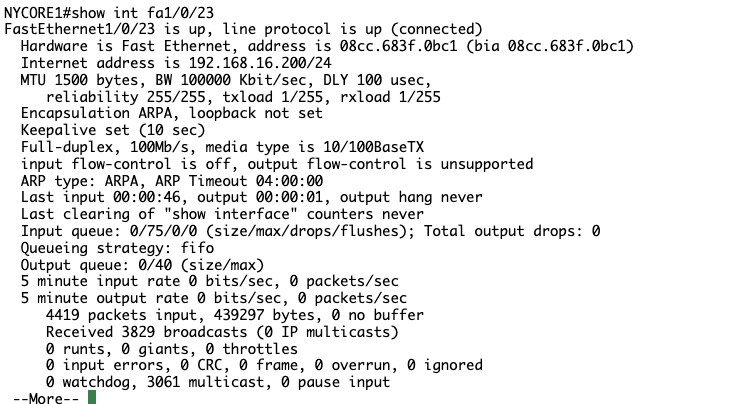
Note it says Internet address will be negotiated using DHCP, good sign lets see if we can get one assigned.
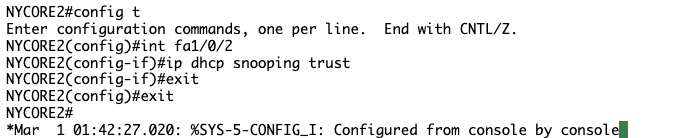
Step 5?:
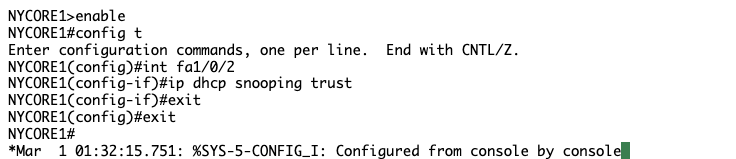
NYCORE1 has an IP address but NYCORE2 still does not, perhaps I need to tell NYCORE to trust the port towards NYCORE1?
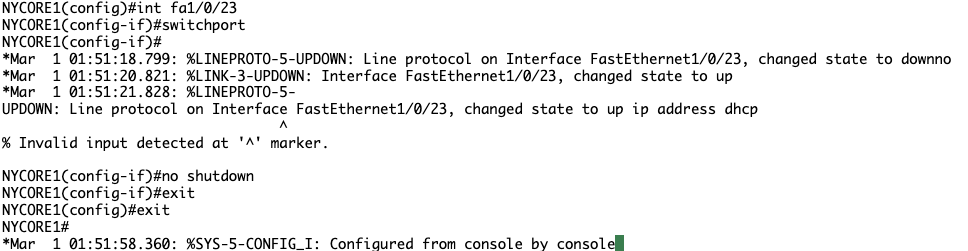
Still no luck, after reviewing previous steps I noticed we have issued no switchport on NYCORE1, lets rectify that…
Check on NYCORE2

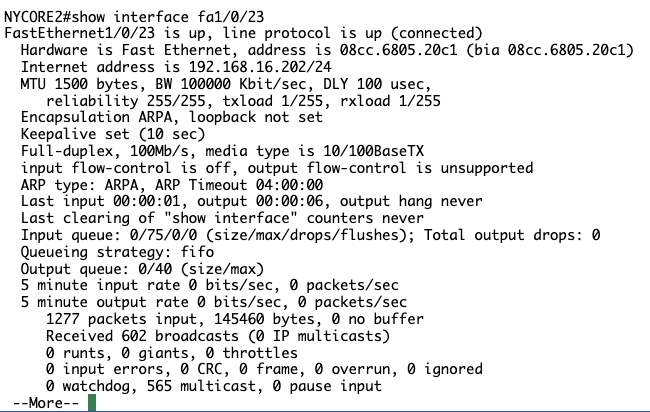
SUCCESS! NYCORE2 has received it’s IP address from the DHCP server. Lesson learnt: Read closely, saves time.
Task 2 – Configuring Dynamic ARP Inspection (DAI)
DAI is another layer 2 security feature that protects the switch from an attack like ARP poisoning. It checks all ARP packets on untrusted interfaces, compares it with the DHCP snooping database. If the information doesn’t match, it will drop the packet. In this task, you will configure an IP address on NYACCESS1 switch. You will use the same IP address that the DHCP server assigned to NYCORE2 in the previous task. You will also try to ping the DHCP server (NYWAN1 router) with a MAC address that is different from the one that NYCORE1 has in its DHCP snooping database.
Step 1
First, you will check the DHCP snooping database on NYCORE1.
Connect to NYCORE1 and type the following command:
NYCORE1#
show ip dhcp snooping binding
Press Enter.
You will see the following output:
NYCORE1#show ip dhcp snooping binding
MacAddress          IpAddress        Lease(sec)  Type           VLAN  Interface
------------------  ---------------  ----------  -------------  ----  --------------------
10:BD:18:E1:A1:41   192.168.16.20085712       dhcp-snooping   1     FastEthernet1/0/23
00:12:D9:40:DA:D8   192.168.16.201   86371       dhcp-snooping   1     FastEthernet1/0/24
Total number of bindings: 2
NYCORE1#
My Output:
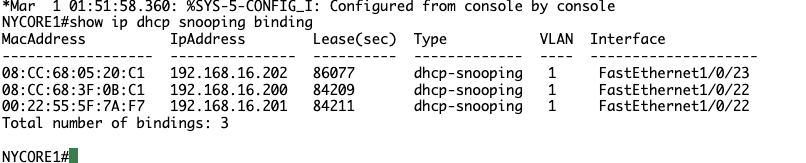
Mine slightly differs, I assume from previous task mistake. Fingers crossed we don’t encounter any issues, will monitor closely.
Step 2
You will now configure dynamic ARP inspection on NYCORE1.
Type the following commands (press Enter after each command):
NYCORE1#
configure terminal
NYCORE1(config)#
ip arp inspection vlan 1
NYCORE1(config)#
exit
You will see the following output:
NYCORE1#configure terminal
Enter configuration commands, one per line.  End with CNTL/Z.
NYCORE1(config)#ip arp inspection vlan 1
NYCORE1(config)#exit
NYCORE1#
My Output:

Step 3
Connect to NYACCESS1 and configure interface vlan 1 with the IP address 192.168.16.200. This address is already available in the DHCP snooping table on NYCORE1 switch, but it is bound to another MAC address (MAC address of interface fastethernet1/0/23 on NYCORE2). So, by creating the same IP address, you are simulating an attacker on a network.
Type the following commands (press Enter after each command):
NYACCESS1#
configure terminal
NYACCESS1(config)#
interface vlan 1
NYACCESS1(config-if)#
ip add 192.168.16.200 255.255.255.0
NYACCESS1(config-if)#
exit
NYACCESS1(config)#
exit
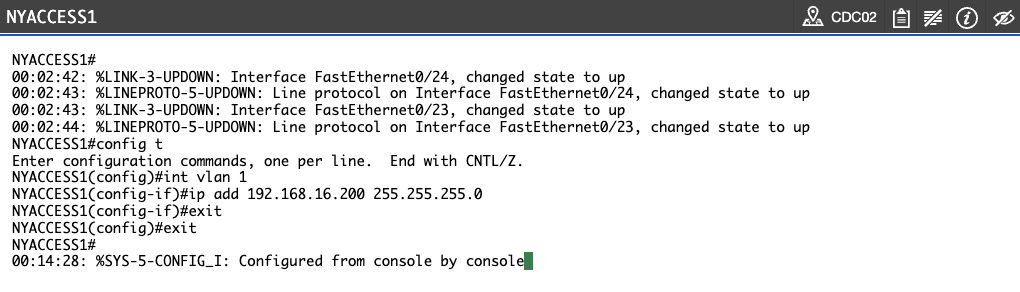
You will see the following output:
NYACCESS1#configure terminal
Enter configuration commands, one per line.  End with CNTL/Z.
NYACCESS1(config)#interface vlan 1
NYACCESS1(config-if)#ip add 192.168.16.200 255.255.255.0
NYACCESS1(config-if)#exit
NYACCESS1(config)#exit
NYACCESS1#
AAAAND have encountered a new issue. NYACCESS1 is requesting a password. This has happened previously, I assume when other users assign one when using the lab.
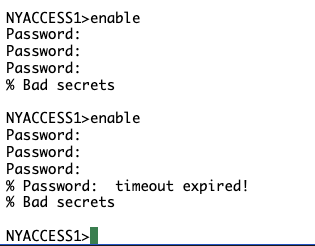
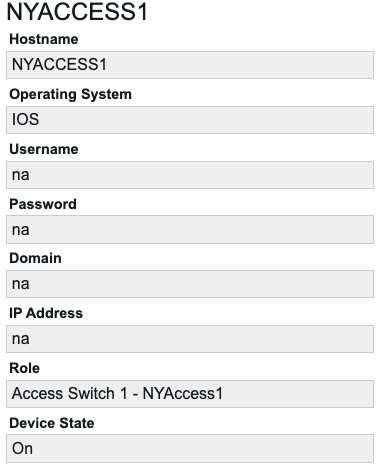
Have tried all generic passwords and passwords I could think of used within the PracticeLabs. Will try logging off and reopening Labs.
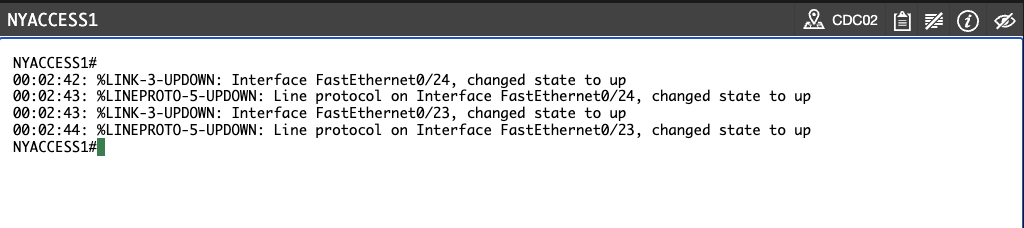
SUCCESS
Reconfigured devices in accordance with Task 1 with no issues
Step 1 and 2 of Task 2


Step 3 We are back on track
Step 4
Now try to ping the DHCP server from NYACCESS1. To do this, issue the following command:
NYACCESS1#
ping 192.168.16.3
Press Enter.
You will see the following output:
NYACCESS1#ping 192.168.16.3

Type escape sequence to abort.
Sending 5, 100-byte ICMP Echos to 192.168.16.3, timeout is 2 seconds:
.....
Success rate is 0 percent (0/5)
NYACCESS1#
Notice the ping was unsuccessful.
Step 5
Connect to NYCORE1 and check the log messages.
You will see the following output:
*Mar  1 00:43:56.992: %SW_DAI-4-DHCP_SNOOPING_DENY: 1 Invalid ARPs (Res) on Fa1/0/1, vlan 1.([74a2.e63c.5a50/192.168.16.1/0012.d940.
dad8/192.168.16.201/00:43:56 UTC Mon Mar 1 1993])
*Mar  1 00:44:27.283: %SW_DAI-4-DHCP_SNOOPING_DENY: 1 Invalid ARPs (Res) on Fa1/0/1, vlan 1.([74a2.e63c.5a50/192.168.16.1/0012.d940.
dad8/192.168.16.201/00:44:27 UTC Mon Mar 1 1993])
You can see from the above output that DAI is blocking invalid ARPs messages.
My Output:
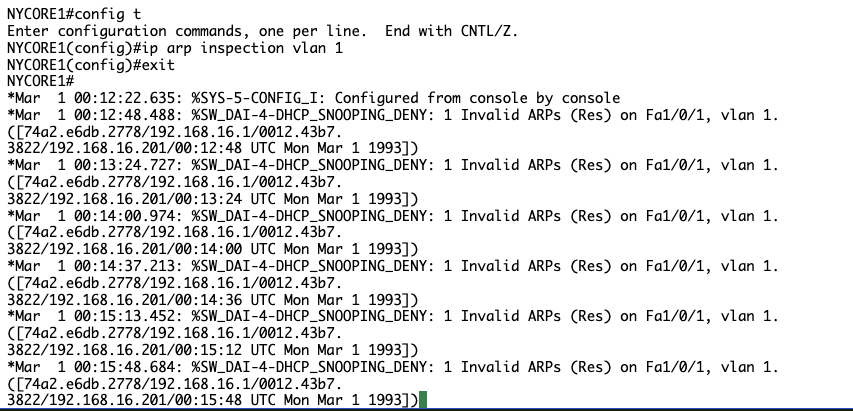
DAI is working.
Task 3 – Configuring Port Security
When you configure port security on a switch, you are actually telling the switch to filter the MAC address. In this task, you will enable port security on NYCORE1 and check what happens with the port when you violate security.
Step 1
Connect to NYCORE1 and check the MAC address table. To do this, issue the following command:
NYCORE1#
show mac address-table
Press Enter.
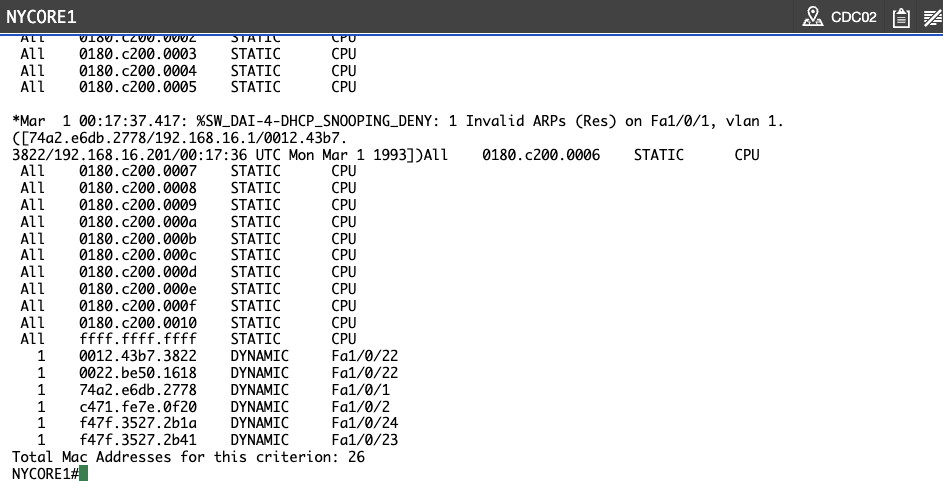
You will see the following output:
NYCORE1#show mac address-table
<----- Output omitted ------>
 All    ffff.ffff.ffff    STATIC      CPU
   1    0012.d940.dad8    DYNAMIC     Fa1/0/24
   1    10bd.18e1.a11a    DYNAMIC     Fa1/0/24
   1    10bd.18e1.a141    DYNAMIC     Fa1/0/23
   1    74a2.e63c.5a50    DYNAMIC     Fa1/0/1
   1    7c0e.ce98.b630    DYNAMIC     Fa1/0/24
   1    fc5b.3955.6030    DYNAMIC     Fa1/0/2
Total Mac Addresses for this criterion: 26
NYCORE1#
Notice that on port Fa1/0/24, you have 3 MAC addresses that are learned.
My Output:
Step 2
You will now enable port security on the Fa1/0/24 port and limit it to allow just 1 MAC address.
Type the following commands (press Enter after each command):
NYCORE1#
configure terminal
NYCORE1(config)#
interface fastethernet1/0/24
NYCORE1(config-if)#
switchport port-security
You will see the following output:
NYCORE1#configure terminal
Enter configuration commands, one per line.  End with CNTL/Z.
NYCORE1(config)#interface fastethernet1/0/24
NYCORE1(config-if)#switchport port-security
Command rejected: FastEthernet1/0/24 is a dynamic port.
NYCORE1(config-if)#
Notice that you can enable port-security only on access ports.
Type the following commands (press Enter after each command):
NYCORE1(config-if)#
switchport mode access
NYCORE1(config-if)#
switchport port-security
You will see the following output:
NYCORE1(config-if)#switchport mode access
NYCORE1(config-if)#switchport port-security
*Mar  1 00:50:12.416: %PM-4-ERR_DISABLE: psecure-violation error detected on Fa1/0/24, putting Fa1/0/24 in err-disable state
By default, when you enable port-security on a port, the port can learn only one MAC address. When port learns the second MAC address, there will be a violation in port-security, and the port will be put in an err-disabled state.
My Output:
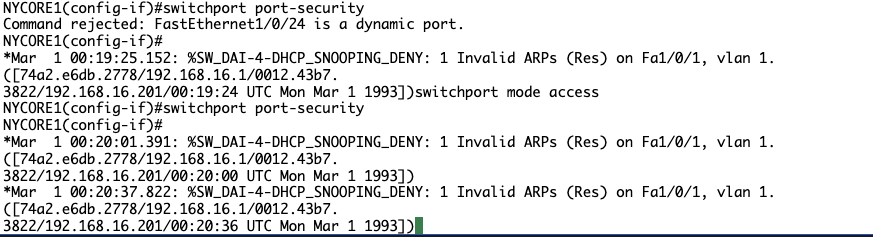
No ERR_DISABLE notice, perhaps it is just taking it’s time
Step 3
You can change this behavior by allowing the port to learn 2 MAC addresses on this port.
Change the maximum number of MAC address on this port to two by issuing the following command:
NYCORE1(config-if)#
switchport port-security maximum 2
Press Enter.
You will see the following output:
NYCORE1(config-if)#switchport port-security maximum 2
NYCORE1(config-if)#
Step 4
Since the port is in an err-disabled mode, type the following commands (press Enter after each command) to recover it:
NYCORE1(config-if)#
shutdown
NYCORE1(config-if)#
no shutdown
NYCORE1(config-if)#
exit
NYCORE1(config)#
exit
You will see the following output:
NYCORE1(config-if)#shutdown
NYCORE1(config-if)#no shutdown
*Mar  1 00:55:10.220: %LINK-5-CHANGED: Interface FastEthernet1/0/24, changed state to administratively down
NYCORE1(config-if)#
*Mar  1 00:55:13.181: %LINK-3-UPDOWN: Interface FastEthernet1/0/24, changed state to up
*Mar  1 00:55:14.187: %LINEPROTO-5-
NYCORE1(config-if)#exit
NYCORE1(config)#exit
NYCORE1#
My Output:
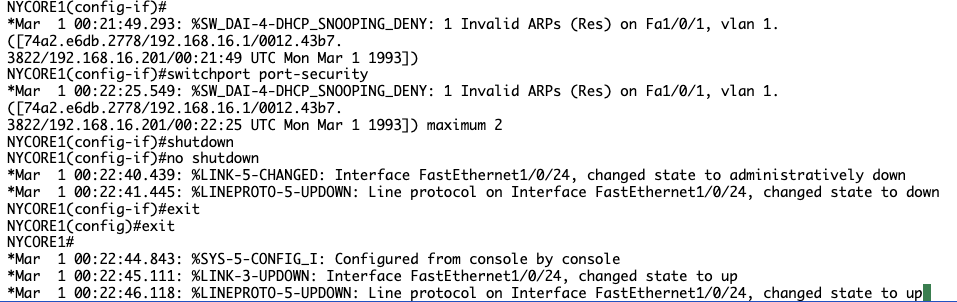
DAI still making it hard to read, will issue command to turn off DAI for now

Step 5
Now verify the port security configuration on NYCORE1 switch.
NYCORE1#
show port-security
Press Enter.
You will see the following output:
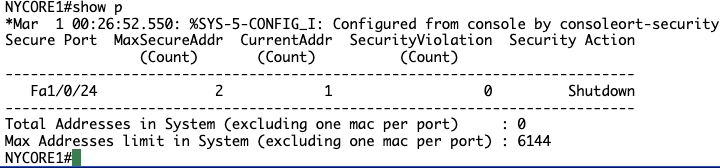
NYCORE1#show port-security
Secure Port  MaxSecureAddr  CurrentAddr  SecurityViolation  Security Action
                (Count)       (Count)          (Count)
---------------------------------------------------------------------------
Fa1/0/24              2            2                  0         Shutdown
---------------------------------------------------------------------------
Total Addresses in System (excluding one mac per port)     : 1
Max Addresses limit in System (excluding one mac per port) : 6144
NYCORE1#
Notice that the default violation action is to shutdown the port. This can be changed by issuing the following commands (press Enter after each command):
NYCORE1#
configure terminal
NYCORE1(config)#
interface fastethernet1/0/24
NYCORE1(config-if)#
switchport port-security violation ?
You will see the following output:
NYCORE1#configure terminal
NYCORE1(config)#interface fastethernet1/0/24
NYCORE1(config-if)#switchport port-security violation ?
  protect   Security violation protect mode
  restrict  Security violation restrict mode
  shutdown  Security violation shutdown mode

NYCORE1(config-if)#switchport port-security violation
In the first two options, the interface will not go to err-disabled state, and it will stay up and running. It will only block frames for the MAC address that violates the port- security. Traffic from legal MAC addresses (MAC addresses that didn’t violate port-security) will be allowed on an interface.
My Output:

COMMANDS: switchport port-security (apply port security on access port)
You completed the following exercises: • Exercise 4 – Configuring Layer 2 Security Features
You should now be able to:
- Configure DHCP Snooping
- Configure Dynamic ARP Inspection
- Configure Port Security


Leave a Reply